Welcome back to my series about the ancient art of building a PC. This ‘installment’ will be sure to set you on the edge of your seat! In case you missed my previous posts on the subject (1-4), please do check them out.
It’s great to have a lot of memory, but slow memory can be a bottleneck in a high performance system with multiple cores and multiple memory channels. The latest and greatest and fastest memory you can currently buy is 5000MHz, but we’ll settle for a spritely 3200MHz.
If you are looking for 64GB DIMM of DDR4, the most options available involved sets of 4 DIMMs at 16GB. If your motherboard only has 4 DIMM slots, filling them all up with 16GB will prevent you from maxing out your memory. My particular motherboard (see previous post) supports up to 128GB. If you are also looking for higher performance memory, such as 3200MHz, your choices as a consumer/gamer are even more limited from mainstream sources such as Amazon.
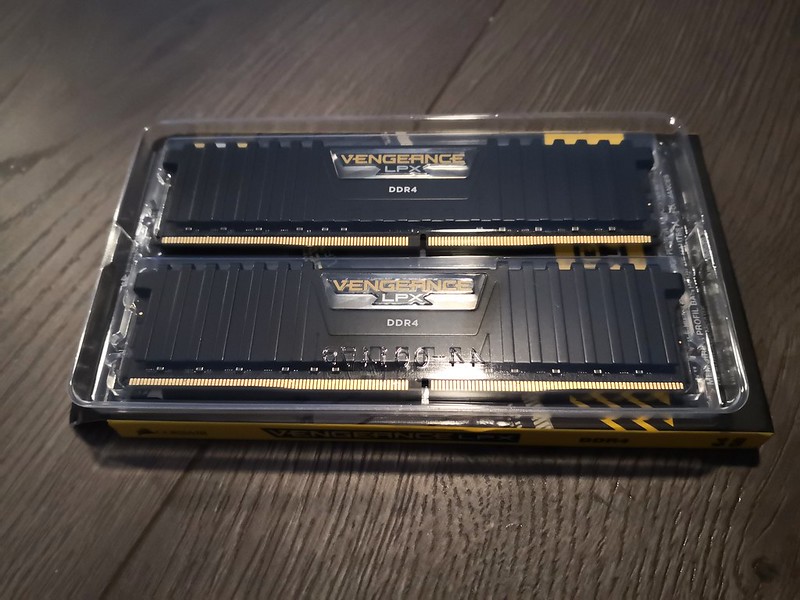
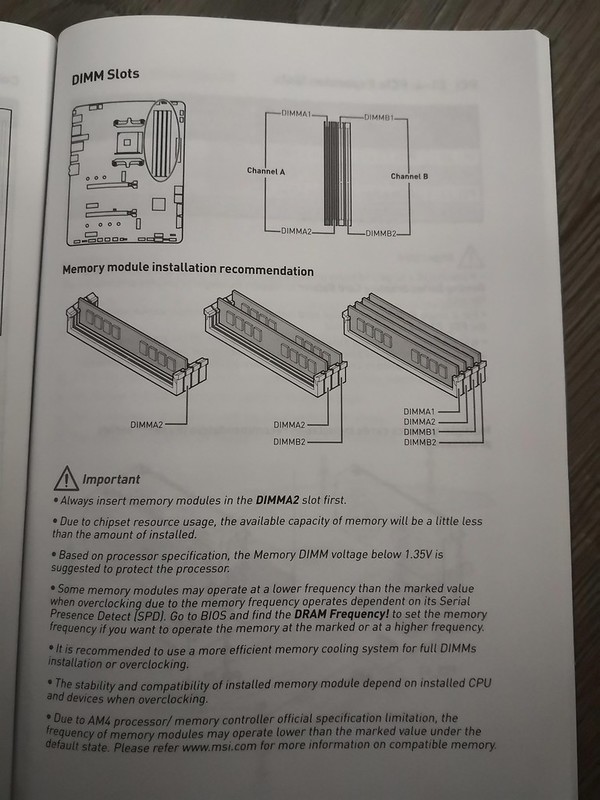
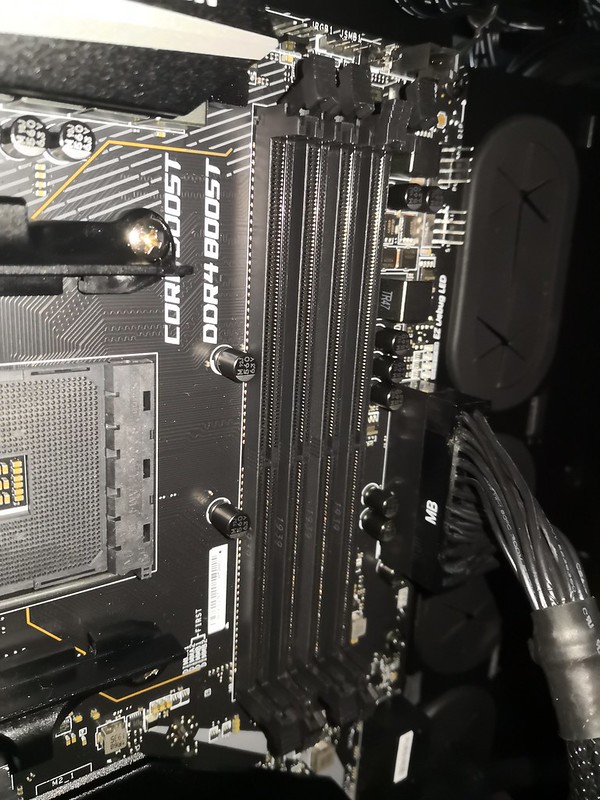
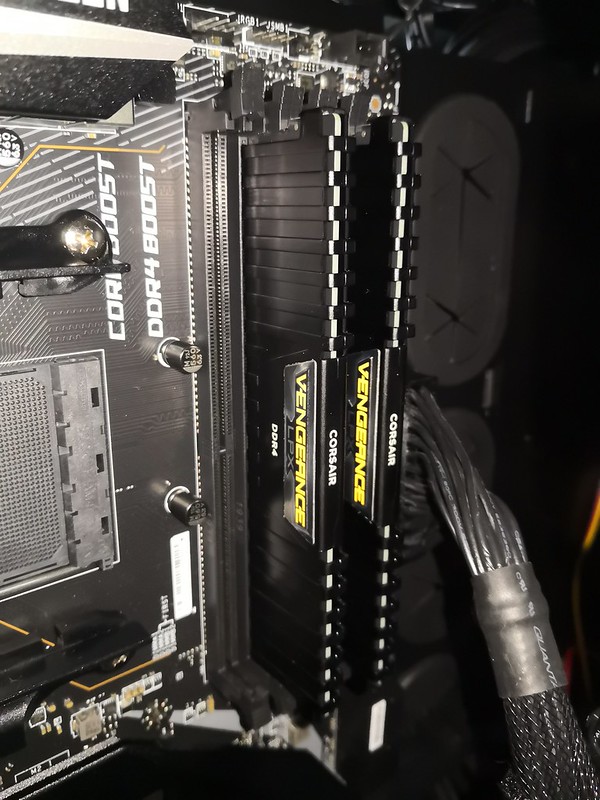
Luckily I found this set of 2x32GB made by Corsair for a mere $299, quite the bargain (sarcasm). This memory ticked all the boxes I was looking for including: * 3200MHz for high performance * 32GB per stick for upgradeability * No disco LED lighting for sanity * Low profile and heat sinks for cooling/air flowThe memory sticks have a heat sink attached to the memory chips. This helps them dissipate heat. They are DDR4 form factor, so they can only be mounted in the memory slot in one direction. This is because one set of gold pins is longer in the other. I have seen many times where people have tried to install them backwards, only to realize they can’t get their PC to boot. It is a good idea to ensure the notch on the memory properly aligns with the keyed memory slot, and the DIMM is properly seated.My particular motherboard supports dual channel operation, meaning there are two distinct paths for memory to communicate with the CPU. This effectively doubles your memory data transfer, if they are installed correctly. Before you actually install your memory, especially if you use less than the maximum number of DIMMS, you should verify in the motherboard manual the order in which they should be installed. Failing to do so could cause your memory to not be recognized properly, or force your system to operate in single channel mode.Here’s a view of our mounted motherboard with RAM slots waiting to be populated with memory. Make sure the little levers on either side are spread apart before inserting the RAM (is it getting hot in here?). Again, it is critical to ensure the notch on the memory stick lines up with the key in the memory slot. Once the memory is installed, firmly press down until you hear a click. At this point, both levers should be closed. If should should happen to open the levers again, it will cause the DIMMs to eject from the slot, so be careful.Here we have the memory installed into each channel as per the documentation. It’s easier to notice now how unintuitive the install pattern is, which is why checking documentation is always recommended.
Thanks for viewing. In the next post we’ll install the CPU, since it turns out I had a decent amount to say about the memory install.